
Fun and fancy party ideas are EVERYWHERE!! For years I have clogged up saved lots of ideas on my favorites bar and planned to do them... I never did. Call me a slacker, if you must. ;) I had good intentions, but I became too busy or would find some GREATER idea before I could use the original one. Well, one of my many resolutions this year was to actually DO some of the projects I'd saved! I started with a cupcake liner wreath, which turned out SO cute. And, I must give thanks to the Tatertots & Jello Blog for sharing these fantabulous ideas with me!
Without further ado, here is how YOU can make your own adorable RIBBON WREATH!! I decided I wanted to do this for my daughter's second birthday... "It's Fun to BEE Two!" :)
What you need:
Foam wreath
LOTS of ribbon- I suggest 9-12 differet kinds (grosgrain or similar works best) and I kept all mine 7/8' wide and smaller, except for the ribbon I used to wrap the wreath, that was 1.5'
Hot glue gun and/or fabric glue
Scissors
** I ordered and bought ALL of my ribbon from Ribbons and Bows Oh My! They carry an AWESOME selection and sell most ribbons in 5 yard lengths, which is just about how much you will need of EACH color/design you use for this project! Their prices are spectacular, too. **
Get out all of your ribbon:

Okay... Start with a foam wreath.


Next: Cut all of your ribbon into about 4.5" pieces... I measured the first one from each color and then just eyeballed it after that.
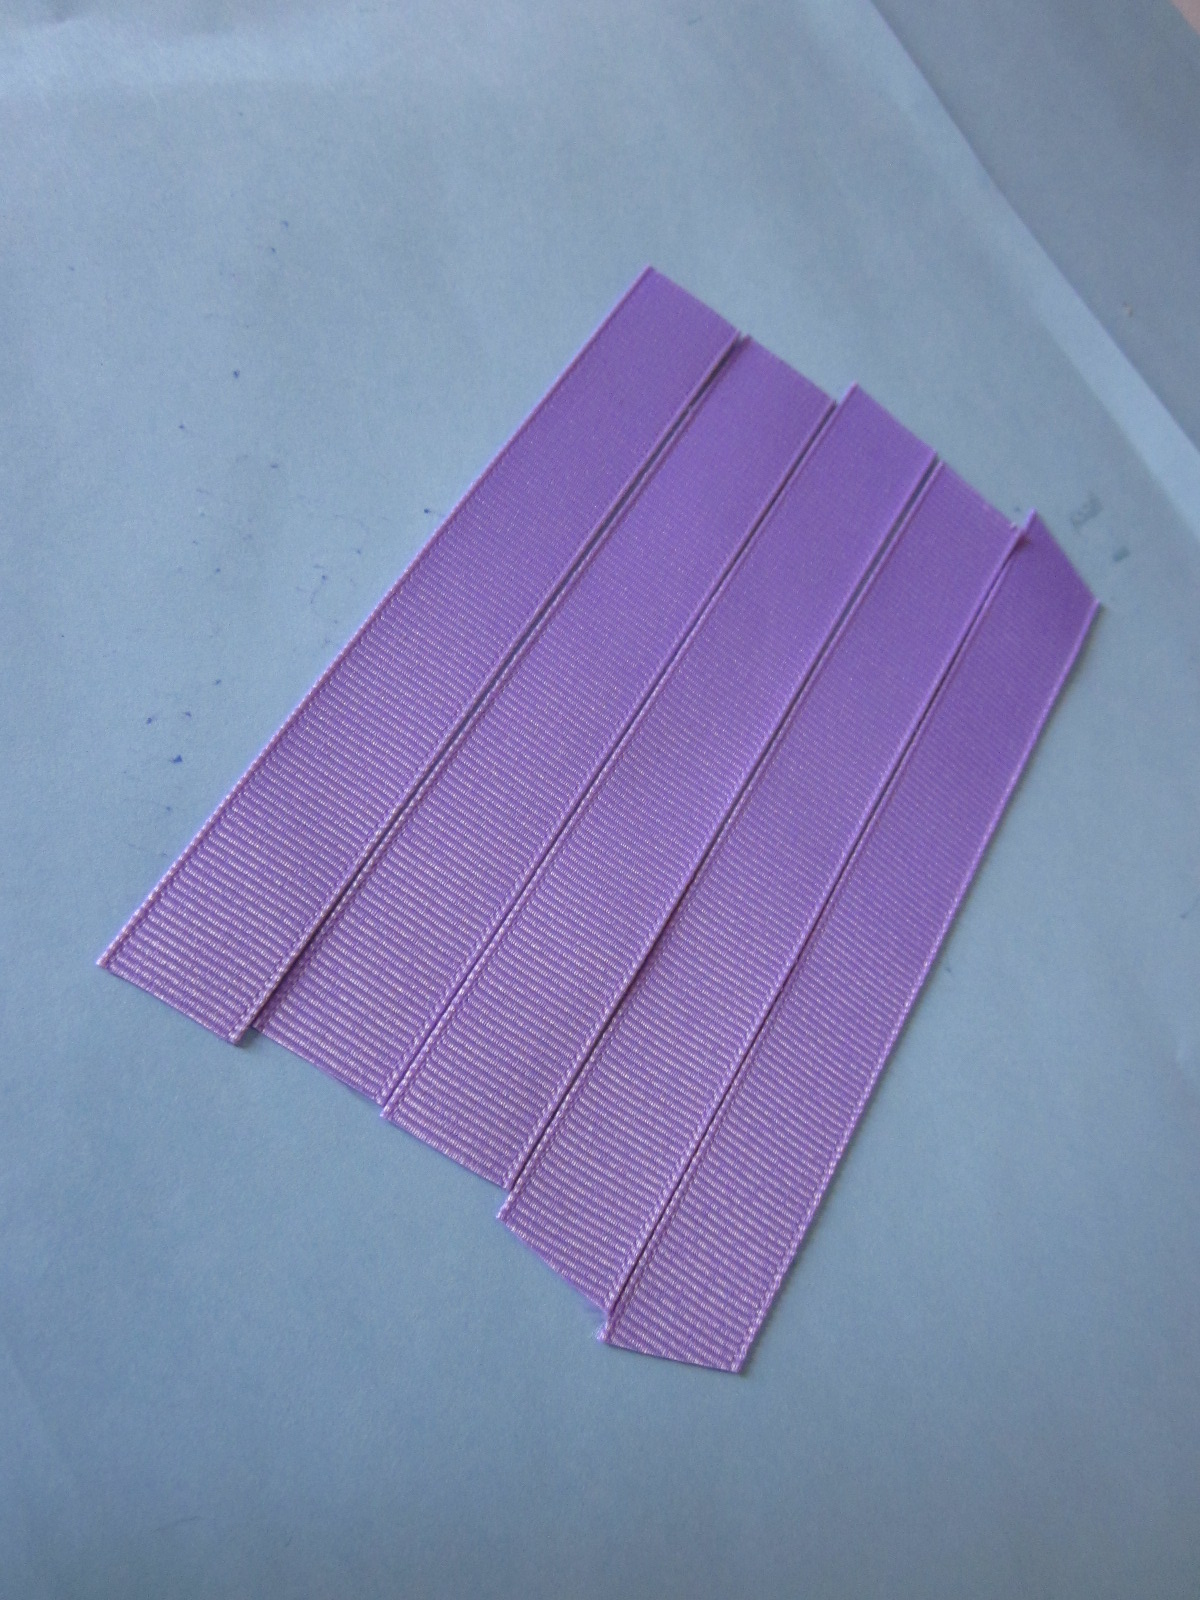
I lined up 5 ribbon pieces at a time, then took my glue gun and made a ribbon down the ends. You want to leave some space at the ends, because thats how you will attach them to your foam wreath!

Then, fold over the pieces, you'll have to work pretty quickly if you do 5 at a time, and attach it to the other side, like so (please note how- a) fat and b) hairy- my hands are. This is why I don't do tutorials. I have MAN hands!! Don't judge :P)

This is how they look when done. Sometimes they kind of attach to each other with the glue, just rip them all apart.

This is how they should look at the ends:

I just tossed them in a box to the side until I had all my colors done. I used 9 total.

Begin working in small sections, I put the glue on the wreath, then took my ribbon, opened the ends and pressed down to attach...

Keep going in little groups all over. Then, go back and fill in.

Here is my finished wreath!! I just took a long piece of two ribbons and tied them at the top to hang. And, I attached a bee embellishment my mom gave me to tie in the Bee theme!


I didn't even end up using all of what I cut, but I also could have filled in a lot more. This pic shows the center, I didn't even go inside much to fill. I could have if I wanted to but I


So, what do you think?? If you make one, PLEASE let me know! Post a pic on my FB page, or leave me a comment to YOUR blog here!!
3 comments:
I love it! and I think I'm going to make one for Emma's room with little birds and a tree in the middle of it.
awesome...as always kristin!!! very nice tutorial AND the wreath is beautiful!! thanks for the suggestion of Ribbons and Bows Oh My! too. ;-)))
LOVE it!! I can't wait to try to make one : ) Great tutorial!
Post a Comment